You might wonder why a drivetrain specialist wants to give motorsport wiring harness tips. “you guys just make hardware components to get the engine power on the street..”
That is correct, but everything in the car is depending on the wiring and electronics. To validate our designs we need proper data analysis (all sensors are connected with a wiring harness). Our paddleshift system needs a wiring harness to control all components. Bad wiring will cause malfunctions which are very hard to track down.
Producing professional motorsport wiring harnesses is a very time consuming job and you need to be very skilled/experienced. When building a new car, my advice is to outsource the job to a professional company. If you need to make modifications on existing harnesses, the following tips could help avoid those nasty wiring issues.
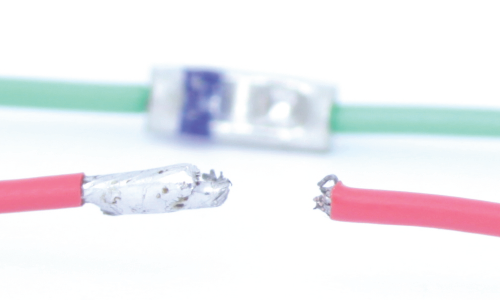
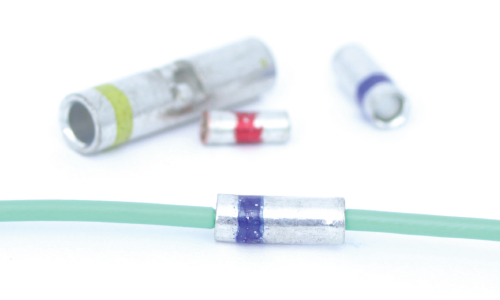
Tip #1: Try to avoid soldering, use splices!
From my experience, most malfunctions come from wires which have been soldered (improperly). My advice is to NEVER solder wires unless there is really no other option. And if you need to solder, use proper material.


The solder joint itself is strong, but the wire will break directly after the joint when vibration is applied on the wire. Therefore, if you need to solder wires, make sure they are properly fixed (for example with glued heat shrink or acid free RTV Silicone).There are a lot of different splices available. We use D200 Miniseal splices (MIL-Spec M81824) for most of our applications (using Daniels GTM232 crimp tool).
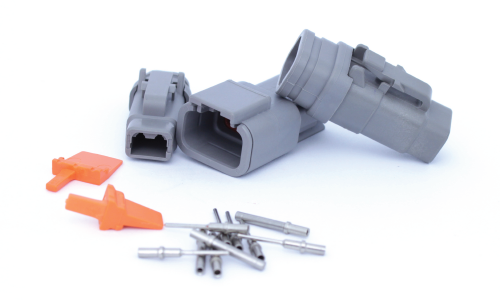
Tip #2: Choose connectors for the right purpose
One of the most unknown parameter for choosing the right connector is decide how many mating cycles will occur. Most standard Automotive connectors are rated for 5-10 mating cycles. After connecting/disconnecting 10 times, it is possible the specifications are not met anymore. When choosing the right connector for the job, take the following specifications in mind:
– How many contacts do I need?
– How many mating cycles will be needed?
– How many amp will go through a contact?
– Which temperature will it reach?
– Will there be moisture/water/chemicals around the connector?
 |
 |
 |
|
| Deutsch DTM | AMP Superseal | TE MQS Gold plated | |
| Mating cycles | 100 | 10 | 100 |
| Max Amp | 7.5 | 14 | 7.5 |
| Max temp | 175 | 125 | 140 |
| Water resistance | IP68* | IP69K* | – |
*IP68 – Protected from total dust ingress. Protected from water to depth more than 1 meter.
*IP69K – Protected from total dust ingress. Protected from steam-jet cleaning.
For example: A gearbox sensor connector will probably get in contact with water and oil. The temperature can exceed 125 Degree C and will have more than 10 mating cycles. The right choice would be a Deutsch DTM or higher spec connector.
Tip #3: Use the right tooling for the job
Always check the documentation of the connector/contacts which tooling is advised, and how to use it. NEVER solder contacts unless it is specified in the documentation. There are a lot of examples available of bad and correct crimps. Check below some examples and manuals:
Manual DTM Series
Manual AMP Series
Manual MQS Series
Tip #4: Use wire strippers

Tip #5: Choose the right wiring and sleeving
A lot of people use the word ‘Milspec’ or ‘Military Spec’ wiring. They are referring to all military specification (there are a lot!!). If you are interested, have a nice read in the following books:
Nasa (100 pages)
NevAir (1031 pages)
I’m not saying you need to wire your car like a space shuttle, but using some of their techniques wouldn’t harm you, right? Which type of wire and sleeving should be used, is depending on the purpose and budget. For our wiring harnesses we use Raychem Spec 55A (M22759) wires, DR-25 sleeving and moulded boots. It might be overkill in some applications, but we do not want to be the weakest link in the chain.

A very noticeable difference is flammability of wire insulation and sleeving. Both cables are 5 seconds exposed to a 300 °C heatgun. The bottom cables are melted together and creating shortcut, the spec55A wires are still functioning.
Tip #6: Label everything, update diagrams

Tip #7: If in doubt, start over again
We all have made once a connection and were not 100% sure if it was a solid connection, but due to time or skills we just let it be. It was working for now, right? Next time if you’re not 100% about the connection, do it over again. And again. Until you are fully confident it will not fail and not ruin your race.
Overview tooling and costs
| Crimp tools | |
| Deutsch crimp tool AFM8 | €350 |
| Turret DTM | €50 |
| AMP Superseal crimp tool | €300 |
| TE Ergocrimp tool | €150 |
| MQS Die set | €300 |
| Other tools | |
| Steinel heatgun – temp. sensor | €200 |
| Wire stripper – ST-550 | €30 |
| Wire stripper – Ergo Elite | €250 |
| Dymo Rhino 4200 label writer | €80 |
So you will need to spend roughly €1500-€2000 on tooling as a bare minimum. You also need some basic supplies such as contacts, sleeving and wires (€200-€800 ). It seems a big amount in total, but I believe it will pay off if it will avoid wiring issues and DNF results.
If you want to dig deeper into motorsport wiring harnesses, start by having a look on this website. RB Racing did a great job on getting that much information on a website
Thank you for reading this blog. If you would like to get more blogs on this subject, please share or comment below!


